The AM‐C4000 Series is a high‐speed, energy‐efficient MFP for office work. Its space-saving features and PrecisionCore Heat-Free technology allow for faster printing and higher print quality with speeds up to 40 ISO ppm and, on average, 15 ipm black and 8.0 ipm color. Getting your Epson AM-C4000 set up correctly can be easy if you follow these steps. This thorough guide will lead you through the process of setting up your printer from the moment it arrives to properly installing your first paper document.
Read: How to Set Up Your Canon imagePRESS C165 Printer
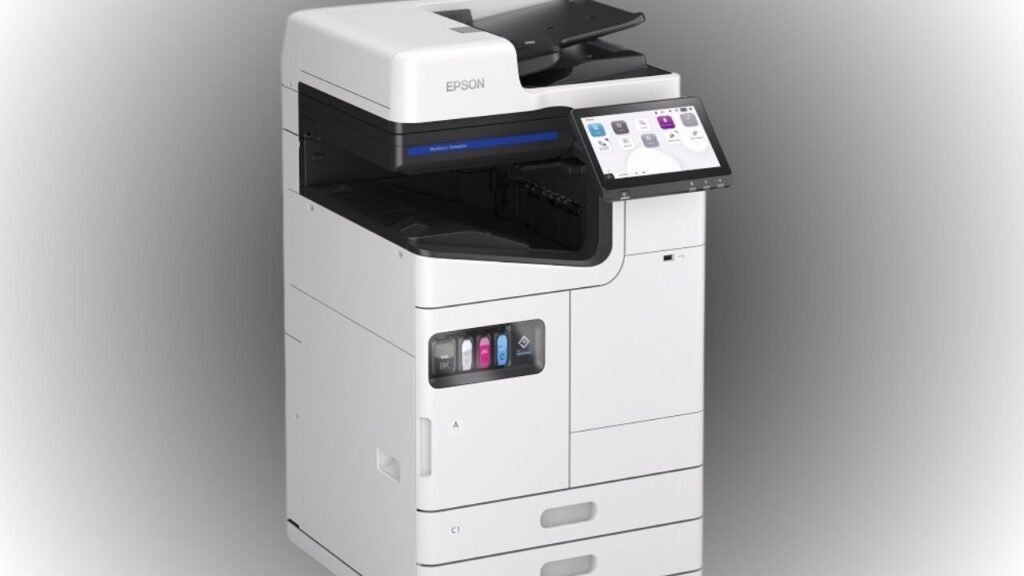
Unboxing and Checking the Contents
Unpacking First off, before going into how to unpack your Epson AM-C4000, make sure you have unboxed it and that everything arrived in the box. In the box, you should have:
- Epson AM-C4000 printer
- Ink cartridges initial set
- Power cord
- Setup guide and user manual
- Supplemental Drivers and Software CD/DVD
- Network cable
Remove the printer and accessories from the box, and remove the tape and foam from around the printer. Place the Epson AM-C4000 on a flat, stable surface with adequate space for ventilation and access to the control panel.
Installing the Ink Cartridges
Built with high-capacity ink cartridges, the AM-C4000 Epson can print. Here’s how to install them:
- Power On the Printer: Plug in the power cord, then press the power button on the control panel. The printer will initialize.
- Open Ink Cartridge Bay: Locate the ink cartridge bay (the bay is located inside the printer on the front or the side, depending on the printer) and lift the bay door as indicated by the setup guide.
- Place the Cartridges in: Pick up both cartridges from your bag and give them a little shake (as per the instructions), pull the little protective plug off the cartridge, and slot it in. You should hear a click when in place.
- Cover back the Cavity: Lock the gate and let the printer units start to read the cartridges. The ink system is now charging. This can take a few minutes.
Loading Paper
Proper paper loading is essential to help prevent paper jams. The Epson AM-C4000 can also deliver a range of papers and sizes. Here’s how to load paper:
- Open Paper Tray: Open the paper cassette or the paper tray.
- Adjust Size: Guides to the width of the paper, A4 size or Letter size.
- Load the Paper: Load the paper stack in the tray and make sure that the stack is correctly placed and is not above the maximum. Avoid overfilling to prevent jams.
- Set Paper: You choose the type and size of paper on the printer through its control panel. That means the Epson AM-C4000 will be able to change print settings to match your media, by default.
Connecting to a Network
The AM-C4000 is both wired Ethernet and wireless-ready. Simply choose which design best complements your office!
Wired Connection (Ethernet)
- Connect the Cable: Plug one end of the Ethernet cable to the Ethernet port on the back of the printer and the other end to a router or network switch.
- Change the Settings: The printer should find the network automatically. Simply follow the onscreen instructions, and you will be able to connect on the next screen. If so, use the keypad on the control panel to enter the code.
Wireless Connection
- Open the Network Settings: Menu on the Epson AM-C4000 control panel for the Wireless or Network settings menu, depending on the AM-C4000’s type of network connection.
- Choose Your Wi-Fi Network: Pick your network and type in your password using the on-screen keyboard.
- Confirm Connection: A message will show when the printer is connected. Write down the IP address for later use.
Installing Drivers and Software
To get the most from the Epson AM-C4000, you need to make sure the appropriate driver and software are installed on your system.
- Download Software: Visit the Epson support site epson.com or whatever is the appropriate regional site, and you should find the driver you need for your Epson AM-C4000. Select your OS as Windows or macOS, and then download Epson Product Setup from the package section.
- Execute the SetupFile: To start the installation, open the downloaded file and click the run button. Ensure your printer is powered on and connected to the same Wi-Fi network as your computer.
- Accept the Printer Agreement: The driver software installation will automatically start, and the software will search for any link with the Epson AM-C4000. You’ll pick it, then follow the instructions. For macOS, you may need to add the printer manually at ”System Preferences > Printers & Scanners”.
- Add Software: Choose from options like Epson Document Capture Pro for scanning directly to the cloud or Epson Remote Services for managing all of your devices.
Testing the Printer
After the setup process is complete, try out the Epson AM-C4000 to confirm that everything is running correctly :
- Print a Test Page: From your computer, print a test page to your printer. First, just print a basic file like a text doc to make sure you are getting the kind of print quality you want.
- Test Scanning and Copying: Press the right arrow on the control panel to copy a document or scan to a computer or network folder. Ensure the scan looks as you would want.
- Verify Network Connection: If the Epson AM-C4000 is networked, then make sure it is online and available to devices that send print jobs to it.
Troubleshooting Common Issues
If you have issues with the setup, you might want to try:
- Printer Not Found: Please ensure that the AM-C4000 is in the computer’s wireless network. Check wired connections; re-input your Wi-Fi password.
- Media Detect Error: Check the paper type and paper size settings on the printer driver, and load the correct paper. Media Detect Error: Check the Paper type and size settings on the printer driver and load the appropriate paper. If you still have a problem, wash the paper sensor.
- Driver Installation Fails: Go to the drivers section for your model. Be sure your computer is connected to the internet before starting.
Optimizing Your Epson AM-C4000
Here are a couple of tips to help you get the most out of your Epson AM-C4000:
- Update Firmware: Check for available firmware updates with the Epson Software Updater and install the updates.
- Use Genuine Ink: Never take chances with normal Epson ink cartridges to maintain the quality of prints and thereby avoid any damage.
- Enable Energy-Saving Features: The Epson AM-C4000 is very much about energy savings indeed, it benefits from Epson’s Heat-Free technology, and these can likewise be fine-tuned by a menu on the control panel.
Conclusion
Installing the Epson AM-C4000 Series printer is not a big problem once you break it down. From unboxing and installing ink cartridges to connecting your computer to your network, installing software, and testing the printer, this guide will ensure you have what you need to get rolling with your new printer in just one hour. Perfect for businesses with high cheque print volumes, the Epson AM-C4000 is both robust and efficient in an office environment. If you need assistance, refer to the online help for the user’s guide or contact the Epson toll-free number at 1-800-319-5804 for expert assistance. Start using your Epson AM-C4000 today!