
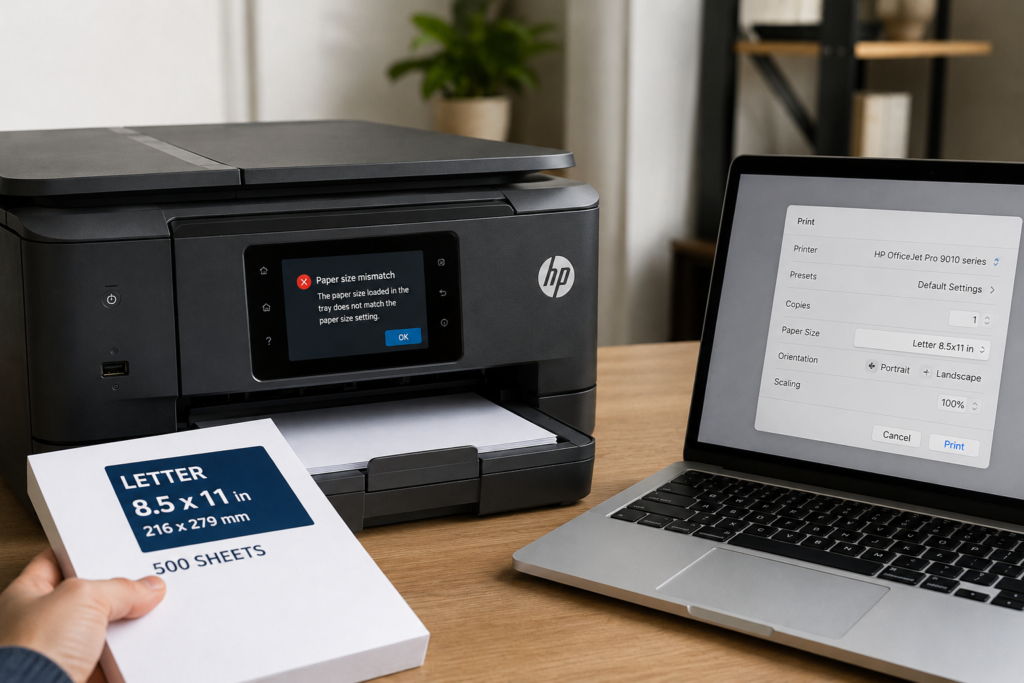
This guide is for informational purposes only. We are not affiliated with any brand mentioned.
▶ Quick Summary — HP Wrong Paper Size Error
- Most common cause: Three separate settings — the physical tray guides, the printer’s tray size setting, and the print job’s paper size in your app — must all match, and usually only one of them is actually wrong
- First check: The physical paper guides in the tray — if they sit between notches instead of snapped firmly into position, the printer misreads the size
- Very common mix-up: A4 vs. Letter — nearly identical dimensions but different settings; printers regularly confuse the two
- Quick fix: Remove all paper, realign the guides until they click into the correct notch, reload, and confirm settings match in both the printer panel and your print dialog
- If guides won’t lock in place: The tray’s plastic detection tab may be physically stuck, broken, or misaligned — this is a hardware-level cause, not a settings issue
- Persistent error after all settings match: A full power reset (unplug 60 seconds) refreshes the tray sensor detection and resolves many lingering cases
You’ve checked the paper. It’s the right size, loaded correctly, sitting flat in the tray exactly as it should be. And the printer still throws up a “Paper Size Mismatch” or “Incorrect Size Paper Loaded” error, refusing to print until you deal with it. It’s one of the more confusing HP errors precisely because the obvious explanation — wrong paper — clearly isn’t true.
This error isn’t actually about whether you have the correct paper. It’s about whether three separate things agree with each other: what the tray’s physical guides are telling the printer, what the printer’s internal tray setting says, and what your print job is requesting. When even one of these three is out of sync, the error appears — regardless of what’s actually sitting in the tray. This guide walks through how to check and align all three, plus what to do if the tray’s physical sensor itself has failed.
Why This Error Appears Even When the Paper Is Correct
Understanding the three-layer system behind this error makes the fix far more logical than randomly reloading paper and hoping it resolves itself.
- Layer 1 — Physical tray guides: The plastic width and length guides inside the paper tray aren’t just there to keep paper aligned. On most HP trays, they also mechanically signal the paper size to an internal sensor or tab. If the guides aren’t snapped firmly into a defined notch — sitting loosely between two sizes — the printer can misread what’s loaded, even if the paper itself is perfectly correct.
- Layer 2 — Printer’s internal tray setting: Separate from the guides, many HP printers (particularly those with a control panel or Embedded Web Server) have a software-level tray size setting that you configure directly on the printer. If this was previously set for a different paper size and never updated, it conflicts with what the guides and the actual paper indicate.
- Layer 3 — Print job settings on your computer: The size you’ve selected in your print dialog (Paper/Quality tab, or Paper tab on laser models) has to match what’s physically loaded. A document formatted for Letter sent to a tray loaded with A4 — or vice versa — triggers the mismatch regardless of how correctly everything else is set up.
How to Fix HP Printer Wrong Paper Size Error
Work through these in order — they correspond to the three layers above, starting with the one that resolves this error most often.
Fix 1: Re-Seat the Physical Paper Guides
This is the single most common fix for this exact error, and it’s worth doing properly even if you’re confident the guides “look” fine — a guide sitting just slightly off its locking notch is easy to miss visually but still causes a misread.
- Remove the paper tray from the printer completely.
- Remove all paper from the tray.
- Locate the width guide (side-to-side) and length guide (front-to-back) — they’re usually grey or blue plastic sliders with small size markings (A4, Letter, Legal, etc.) printed alongside the tray.
- Slide both guides all the way to their widest position first.
- Reload your paper stack, aligning it against the back-left corner of the tray.
- Slide the guides inward until they rest snugly against the paper — you should feel or hear a slight click as each guide locks into its size notch. Don’t force them tighter than a gentle, flush contact with the paper edge.
- Confirm both guides are sitting exactly on a marked size line, not between two markings.
- Reinsert the tray fully until it clicks into place in the printer.
Fix 2: Check and Correct the Printer’s Tray Size Setting
Many HP printers — especially LaserJet and higher-end OfficeJet Pro models — store a separate tray size setting independent of the physical guides. If this wasn’t updated the last time the paper size changed, it directly conflicts with what’s now loaded.
Via the printer’s control panel:
- On the printer’s touchscreen or control panel, navigate to Setup or the gear/wrench icon.
- Select Tray Setup, Paper Setup, or Tray and Paper Settings (naming varies by model).
- Select the specific tray you’re using (Tray 1, Tray 2, etc.).
- Confirm the Paper Size shown matches what’s physically loaded — change it if it doesn’t.
- Save the setting and try printing again.
Via the printer’s Embedded Web Server (for network-connected models):
- Print a network configuration page from the printer, or check its display, to find its IP address.
- Enter the IP address into a web browser on your computer.
- Navigate to the Settings or Paper Setup section of the web interface.
- Confirm and correct the tray size setting, then save changes.
Fix 3: Match the Print Job’s Paper Size Setting in Windows
Even with the tray and guides perfectly correct, your computer’s print dialog needs to request the matching size — otherwise the mismatch will keep appearing.
- In the document you’re trying to print, go to File > Print.
- Make sure your HP printer is selected, then click Properties, Preferences, or Printer Setup (the exact label depends on the program).
- For most HP inkjet and OfficeJet models, go to the Paper/Quality tab. For HP LaserJet models, go to the Paper tab.
- Check the Paper Size dropdown (sometimes labelled Original Size) and confirm it matches exactly what’s loaded in the tray — pay particular attention to A4 vs. Letter, since both appear similar in the dropdown list.
- Also check the Paper Source setting (sometimes under Feed From) and confirm it’s pointing to the correct tray, especially if your printer has more than one.
- Click OK, then print again.
Fix 4: Remove and Reload the Paper Completely
Sometimes the issue isn’t any single setting but how the paper stack itself is sitting in the tray — uneven stacking or overfilling can interfere with how the sensor or guides read the load, even when the guides themselves are correctly positioned.
- Remove the tray and take out all paper completely.
- Fan the paper stack briefly to separate any sheets that may be sticking together.
- Tap the stack on a flat surface to align all edges evenly.
- Reload the stack flat into the tray, making sure it sits below the maximum fill line marked inside the tray — an overfilled tray can prevent guides from seating correctly.
- Re-adjust the width and length guides so they rest gently but firmly against the stack edges.
- Reinsert the tray and test print.
Fix 5: Perform a Full Power Reset
A complete power reset refreshes the printer’s internal tray-sensor detection, which can clear a lingering mismatch state even after the physical and software settings have all been corrected.
- With the printer turned on, disconnect the power cord from the rear of the printer.
- Unplug the power cord from the wall outlet as well.
- Wait a full 60 seconds.
- Reconnect the power cord directly to a wall outlet first — HP recommends avoiding a surge protector for this step, since some deliver inconsistent power that can interfere with the printer’s startup detection.
- Reconnect the cord to the printer and power it on, allowing it to complete its full startup cycle.
- Test print once it’s fully ready.
Fix 6: Update Printer Firmware
HP periodically releases firmware updates that address sensor detection bugs and paper handling logic. If the error has appeared suddenly without any change to your paper or settings, a firmware issue is worth checking.
- On the printer’s control panel, navigate to Setup > Tools or Printer Maintenance.
- Select Update the Printer or Check for Updates.
- Install any available update and allow the printer to restart.
Fix 7: Inspect the Tray’s Physical Size Detection Sensor
If the guides won’t lock firmly into a marked notch — sliding loosely or failing to click into position no matter how carefully you adjust them — the issue may be a physical fault with the tray’s size detection mechanism rather than a settings problem.
- Remove the tray completely and set it on a flat surface.
- Look for a small plastic tab, lever, or sensor area, usually located near where the width guide slides — this is what mechanically or optically signals paper size to the printer.
- Check whether this tab moves freely when the guide is adjusted, or whether it appears stuck, bent, jammed with debris, or visibly broken.
- If it’s jammed with paper dust or debris, gently clean the area with a dry, soft brush or lint-free cloth.
- If the tab is physically broken or doesn’t move at all when the guide is adjusted, the tray’s detection mechanism has likely failed and may need professional repair or tray replacement — this is the underlying explanation in cases where no combination of settings ever resolves the error.
Fix 8: Reset the Printer to Factory Defaults
If the error persists after every other fix, a factory reset clears all stored settings — including any corrupted tray configuration — and forces the printer to start fresh. This is more thorough than the power reset in Fix 5 and addresses configuration-level corruption rather than just refreshing sensor detection.
- On the printer’s control panel, go to Setup > Tools.
- Select Restore Factory Defaults.
- Confirm when prompted — the printer will restart.
- Reconfigure your wireless connection and tray settings from scratch.
- Reload paper carefully following Fix 1, then test print.
Tips to Prevent This Error From Recurring
- Update both the tray setting and print job whenever you switch paper sizes. If you regularly alternate between A4 and Letter, make it a habit to update the printer’s tray setting at the same time you physically swap paper — not just the print dialog on your computer.
- Don’t overfill the paper tray. Staying below the marked fill line keeps the guides able to seat correctly and reduces sensor misreads.
- Check the guides are snapped into a marked notch, not just “close enough.” A guide that looks correctly positioned but isn’t fully seated in its locking position is the single most common recurring cause of this error.
- Keep printer firmware current. Periodic firmware updates from HP often include refinements to paper detection logic, particularly for printers that have had known sensor-related complaints.
When to Check HP’s Official Support
If you’ve worked through every fix above and the error persists — particularly if the tray’s physical guides won’t lock into position at all — HP’s official support documentation covers model-specific paper mismatch troubleshooting and can help determine whether your printer’s tray has a hardware fault requiring repair or replacement. If your printer is still within warranty, HP support can also advise on coverage for a faulty tray sensor.
Wrapping Up
A paper size mismatch error with correctly loaded paper is genuinely one of the more counterintuitive HP printer issues, simply because the obvious explanation doesn’t apply. Once you understand that the error comes from a disagreement between the physical guides, the printer’s internal tray setting, and your print job’s requested size — rather than the paper itself being wrong — the fix becomes a process of checking and aligning three specific things rather than guessing.
Work through the guides first, since that resolves the majority of cases, then check the tray and print job settings in turn. If the error still won’t clear, the tray’s physical sensor is the remaining suspect, and that’s a clear, identifiable thing to check rather than an open-ended mystery.
Frequently Asked Questions
Why does my HP printer say the paper size is wrong when I’m sure it’s correct?
This error isn’t actually checking whether your paper is the “right” size in an absolute sense — it’s checking whether three things agree: the physical tray guide position, the printer’s internal tray size setting, and the paper size requested by your print job. If even one of these three doesn’t match the others, the error appears regardless of what’s physically loaded. The most common cause is a paper guide that’s sitting close to, but not exactly on, its locking notch.
Why does this happen specifically with A4 paper but not Letter, or vice versa?
A4 and US Letter are very close in physical dimensions but are treated as completely different settings by the printer. It’s extremely easy to load one size while the tray setting or print job is still configured for the other from a previous print — and because the two sizes look nearly identical at a glance, this mismatch often goes unnoticed during a quick visual check. Always confirm the exact size selected in both the printer’s tray setting and your print dialog, not just what’s visually loaded.
The paper guides in my tray won’t snap into position — what does that mean?
If the guides slide loosely and won’t click into a defined size notch no matter how you adjust them, this points to a physical fault with the tray’s size detection mechanism rather than a settings issue. Check the small plastic tab or sensor area near the guide track for debris, damage, or jamming. If the tab doesn’t move when the guide is adjusted, or appears broken, the tray’s detection hardware has likely failed and may require repair or replacement.
I get the error every few pages even though I haven’t changed anything — why?
Intermittent mismatch errors that appear partway through a print job, even with consistent settings, sometimes point to a borderline guide position that shifts slightly during printing as paper feeds through, or a tray that’s been overfilled beyond its recommended capacity. Removing all paper, fanning and realigning the stack, reloading below the fill line, and re-seating the guides firmly typically resolves this intermittent pattern.
Will resetting my printer to factory defaults fix a paper size mismatch error?
A factory reset can resolve the error if the cause is corrupted or conflicting stored settings — it clears the printer’s internal configuration entirely, including any mismatched tray size data. It’s a more thorough step than a simple power reset and is worth trying if the error persists after correcting the physical guides, tray settings, and print job settings individually. Note that you’ll need to reconfigure wireless connection and other preferences afterward.
Can a power reset alone fix this error without changing any settings?
Yes, in some cases. A full power reset — unplugging the printer for 60 seconds — refreshes the internal sensor detection that reads the tray’s paper size. If the underlying physical and software settings were already correct but the printer was stuck reporting an outdated mismatch state, a power reset alone can clear it without needing to touch any settings at all.
Disclaimer: This article is provided for informational and educational purposes only. The fixes and procedures described are based on general knowledge of HP printer paper handling systems and publicly reported user experiences. Results may vary depending on your specific printer model and tray configuration. We are not affiliated with HP Inc. Always consult HP’s official support documentation for guidance specific to your printer model, particularly for hardware-related concerns such as a faulty tray sensor.