
This guide is for informational purposes only. We are not affiliated with any brand mentioned.
▶ Quick Summary — Ricoh SC 542 After Firmware Update
- What SC 542 means: A fusing temperature warm-up error — the fuser didn’t reach the required temperature within the expected time after startup
- Why it appears after a firmware update: Firmware updates can reset or recalibrate fusing temperature parameters in NVRAM, causing a fuser that was previously within tolerance to fall outside the new thresholds
- Critical difference from a standard hardware failure: If SC 542 appeared immediately after a firmware update on a previously healthy machine, the cause is likely a calibration shift — not sudden physical fuser failure
- Most important rule: SC 542 is a latched code — it CANNOT be cleared by simply turning the power off and on. SP mode access is required to reset it
- First step: Clean the thermistor(s) on the fuser unit — contaminated thermistors are the most common non-hardware cause, and firmware-triggered threshold changes expose them first
- If the error returns after reset: The fusing unit or thermistor has genuinely failed and needs replacement
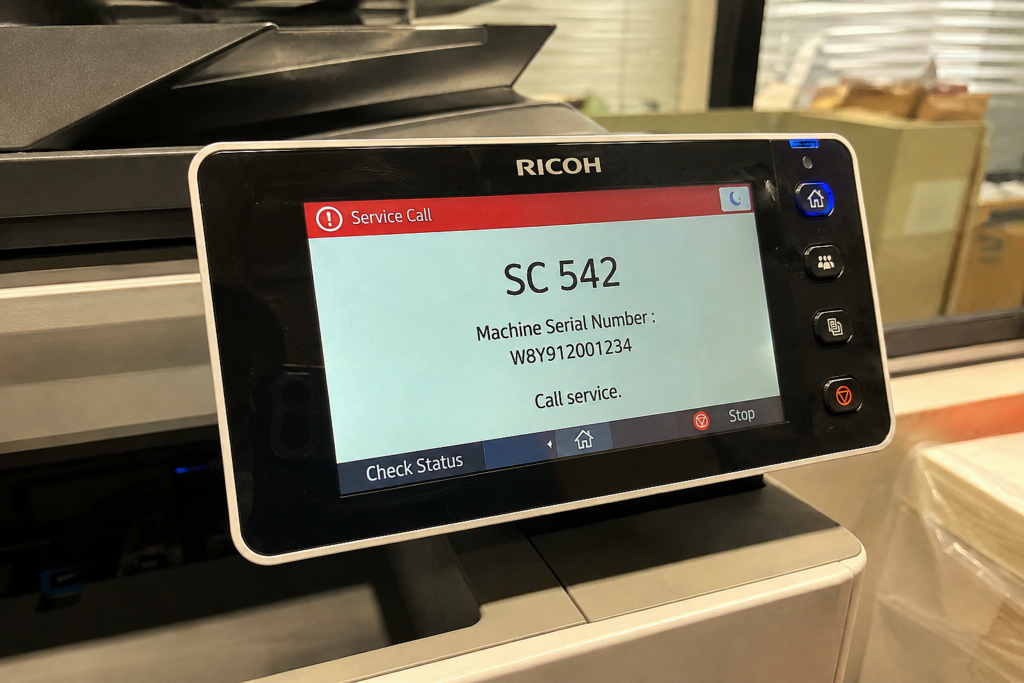
Your Ricoh printer ran a firmware update — and now SC 542 is on the display. The machine was working perfectly before the update. Nothing physical changed. And yet the fuser error is sitting there, refusing to clear no matter how many times you cycle the power.
SC 542 appearing directly after a firmware update is a specific and important scenario — one that looks like a hardware failure but frequently isn’t. A firmware update can change the temperature parameters the machine uses to evaluate fuser performance, causing a fuser that was previously operating within acceptable limits to suddenly register as out of range. Understanding this distinction determines whether your next step is a cleaning and reset, or a component replacement. This guide covers both paths. If you are also seeing charge-related SC errors alongside this fusing code, our guide on Ricoh SC 302 error code covers that fault separately.
What Is SC 542 and Why Does Firmware Trigger It?
SC 542 belongs to Ricoh’s 5xx series — error codes that cover the fusing (fixing) system. In plain terms, the fuser is the heated unit inside the printer that melts toner onto paper by applying heat and pressure. Without a functioning fuser, toner sits on the page and smears — the fusing process is what makes the print permanent.
SC 542 specifically means: Fusing temperature warm-up error. The machine’s internal monitoring detected that the fusing unit did not reach the required standby temperature within the expected time after the main power switch was turned on. When this condition is detected, the machine locks itself out to prevent incomplete fusing and potential hardware damage.
The sub-codes provide additional detail:
- SC 542-00 — General fusing warm-up failure; standby temperature not reached within the specified time
- SC 542-01 — Thermopile sensor 1 (center of the heating roller) reporting an abnormally low temperature reading, or the rate of temperature increase is insufficient
- SC 542-02 — Second thermistor/thermopile fault, specific to models with dual-sensor fusing systems
Why Firmware Updates Trigger SC 542
The connection between a firmware update and SC 542 is not obvious, but it has a clear technical explanation — and knowing it changes how you approach the fix.
Ricoh printers store fusing temperature parameters in NVRAM — non-volatile memory that holds settings even when the power is off. These parameters include target standby temperatures, acceptable warm-up time limits, and the threshold values the thermistor readings are compared against. A firmware update can modify, reset, or recalibrate these stored parameters as part of its changes to the machine’s operating logic.
When this happens, a fuser that was previously performing within the old parameters may no longer meet the revised thresholds. A slightly contaminated thermistor that was reporting close to — but within — the acceptable range before the update may now read as out of specification. A fuser lamp that was delivering adequate heat before may now fall short of the updated temperature target. The hardware hasn’t changed, but the standard it’s being measured against has.
This is the key insight: SC 542 after a firmware update does not automatically mean the fusing unit has failed. It means the fuser’s performance is being evaluated against new parameters, and it didn’t pass. Cleaning the thermistor and resetting the SC code — before touching any hardware — is the correct first step.
Common Causes of SC 542
Whether triggered by a firmware update or appearing independently, the underlying physical causes of SC 542 follow a consistent pattern:
- Dirty or contaminated thermistor — the most common and most fixable cause. The thermistor(s) that monitor fuser temperature accumulate toner particles and fine paper dust over time. A coated thermistor face cannot read temperature accurately, and after a firmware update that tightens the acceptable range, even moderate contamination becomes enough to trigger the code
- Thermistor out of position — the thermistor must sit in precise contact with the fusing roller surface. A thermistor that has shifted slightly doesn’t read roller temperature correctly, even if the fuser itself is generating adequate heat
- Defective or failing fusing lamp — the lamp that heats the fusing roller is a consumable item with a finite lifespan. A lamp approaching the end of its life produces less heat, and a firmware update that raises the temperature threshold can expose this marginal output as insufficient
- Tripped or open thermostat — thermostats are one-time thermal protection devices. If the fuser experienced a temperature spike previously (from a paper jam, for example), the thermostat may have tripped. Unlike a thermistor, a tripped thermostat cannot be reset by cleaning — it requires replacement
- Poor fusing unit connector — a loose, toner-contaminated, or corroded connector between the fusing unit and the main power supply board disrupts the electrical connection that powers the fusing lamp and reads the thermistor signals
- NVRAM calibration data corruption — less common, but a firmware update can occasionally write incorrect values to the fusing temperature calibration entries in NVRAM. This causes the machine to compare thermistor readings against wrong baseline values, triggering SC 542 even when all physical components are healthy
- Defective main control board (BICU) — rare, but a failing board can produce incorrect readings from thermistors that are physically fine
What to Do Before Any Disassembly
Step 1: Confirm the Timing — Was This Immediately After the Firmware Update?
The timing of SC 542’s first appearance tells you a great deal about its likely cause.
- If SC 542 appeared on the first startup after a firmware update — a calibration parameter shift is highly probable. Work through the cleaning and reset steps below before considering any hardware replacement.
- If SC 542 appeared after several print cycles following a firmware update — the update may have raised a threshold that a marginally performing fuser component can now no longer meet under load. Thermistor cleaning is still the first step, but fuser component wear is a more likely factor.
- If SC 542 appeared on a machine with high page count and the firmware update happened to coincide — a genuinely failing fuser is more plausible, though the cleaning and reset path is still worth completing before purchasing replacement parts.
Step 2: Attempt a Full Power Cycle (Knowing It Won’t Clear the Code)
A complete power reset — unplugging the machine from the wall for 60 seconds — is still worth doing as a first step, even though it won’t clear the SC 542 code. It ensures the machine starts in a clean electrical state before you attempt any SP mode procedures, reducing the chance of incomplete resets due to residual power in the system.
- Press the main power switch to off.
- Unplug the power cord from the wall outlet completely.
- Wait 60 seconds.
- Reconnect and power on.
If SC 542 reappears immediately on startup, proceed with the steps below.
How to Fix Ricoh SC 542 After a Firmware Update
Fix 1: Clean the Fusing Thermistors
This is the first physical fix to attempt, and it resolves a meaningful number of SC 542 cases — especially those triggered by a firmware update exposing a thermistor that was borderline contaminated before the updated thresholds came into effect.
- Power the machine off and unplug it from the wall.
- Open the front cover and locate the fusing unit — typically a large assembly with a handle, running horizontally across the lower-right area of the machine interior. Refer to your model’s user guide if the location isn’t clear.
- Release the fusing unit’s locking levers (usually green or grey) and carefully slide it out along its guide rails.
- Locate the thermistor(s) — they are small, rectangular components with a smooth sensor face, positioned so the face rests against or very close to the fusing roller surface. Depending on your model there may be one or two.
- Using a dry, clean lint-free cloth, gently wipe the thermistor face to remove any toner residue, dust, or film buildup. Work in a single direction along the sensor face — do not use solvents, alcohol, or compressed air directly on the thermistor.
- While the fusing unit is out, also inspect the fusing unit connector — the multi-pin connector that links the unit to the machine’s electrical harness. Disconnect and reconnect it firmly to ensure clean contact.
- Slide the fusing unit back into position until it locks in place.
- Close the front cover and proceed to the SP mode reset below.
Fix 2: Reset SC 542 Via SP Mode
After cleaning the thermistor (or confirming the physical components look correct), the SC 542 code must be cleared through SP mode before the machine will resume normal operation. The exact entry sequence varies by model family — the correct procedure for your machine is listed below.
Reset Method A — Standard Ricoh MP, IM, and SP Series (most common):
- With the machine powered on and displaying SC 542, press the Clear Mode button (yellow key).
- Enter 1, 0, 7 on the numeric keypad.
- Press and hold the Clear/Stop key for approximately 3 seconds until the SP (Service Program) menu appears on screen.
- On the touchscreen, select Copier SP.
- Navigate to SP 5810, sub-code 02.
- Press 1 (or Execute / OK depending on model) to confirm the reset.
- Press the main power switch off, wait 10 seconds, then power back on.
- Allow the machine to complete its full warm-up cycle and observe whether SC 542 returns.
Reset Method B — Older Ricoh Aficio Models (MP C6000, C7500, Aficio 2022, and similar):
- With the machine powered off, hold the Online and Escape buttons simultaneously.
- While holding both buttons, press the main power switch to turn the machine on.
- Continue holding the buttons until the Service Mode menu appears on the display, then release.
- Using the arrow keys, scroll to Eng Maintenance and press OK.
- Scroll to Fuser SC Reset and press OK twice to confirm.
- Power the machine off and then back on.
Reset Method C — Ricoh SP 202SN and Small Laser Models:
- With the machine powered on and connected to a PC, open Smart Organizing Monitor from your printer driver software.
- When prompted for a password, enter Admin074.
- Navigate to the Maintenance tab.
- Select SC Reset and confirm the execution.
- The machine will reboot automatically — allow it to complete the full startup cycle.
Fix 3: Check and Reseat the Fusing Unit Connector
After a firmware update, the machine goes through a full startup sequence that includes testing the fusing unit’s electrical connections. A connector that worked fine during normal operation may not pass the more rigorous startup test if it has marginal contact. Reseating it forces a clean connection.
- Power off and unplug the machine.
- Remove the fusing unit as described in Fix 1.
- Locate the multi-pin fusing unit connector — usually on the rear face of the unit, connecting to a harness from the machine’s main chassis.
- Disconnect the connector completely and inspect both sides: look for bent pins, toner buildup on the metal contacts, or signs of heat damage around the connector housing.
- If toner or debris is present on the contacts, clean them with a dry cotton swab. Do not use metal tools on the contact pins.
- Reconnect firmly and reinstall the fusing unit.
- Attempt the SP mode reset from Fix 2 and monitor whether SC 542 returns.
Fix 4: Check for a Tripped Thermostat
The fusing unit contains one or more thermal cutoff thermostats — one-time safety devices designed to interrupt the circuit if the fuser reaches a dangerously high temperature. Once tripped, a thermostat cannot reset itself and must be replaced.
A tripped thermostat is most commonly caused by a previous paper jam that left media against the fuser surface while it continued heating, or by a power surge. A firmware update that changes warm-up behavior could theoretically push a marginal fuser briefly into the thermostat’s cutoff range during its first startup under the new parameters.
- With the fusing unit removed and cooled, locate the thermostat(s) — typically small cylindrical or oval components mounted on the fusing unit frame.
- Using a multimeter set to continuity mode, test across the thermostat terminals. A healthy thermostat shows continuity (beep or near-zero resistance). A tripped thermostat shows no continuity (open circuit).
- If the thermostat is open, it has tripped and needs replacement. A new thermostat for your specific fusing unit model can usually be sourced from a Ricoh parts supplier — confirm the correct part number against your model’s service documentation.
Fix 5: Replace the Fusing Thermistor
If cleaning the thermistor didn’t resolve the issue and the thermostat tests fine, the thermistor itself may have failed — either from age and extended use, or from the physical contact stress of the fusing roller wearing the sensor face down over time.
Signs that the thermistor needs replacement rather than cleaning:
- The thermistor face is visibly scratched, worn through, or physically damaged
- After cleaning, the SC 542 error returns within a few print cycles rather than clearing permanently
- A multimeter check shows the thermistor’s resistance reading is significantly outside the expected range for the operating temperature (refer to your model’s service manual for the correct resistance specification)
Thermistors are typically available as individual replacement components or as part of a fusing unit maintenance kit. Confirm the correct part number for your specific Ricoh model before ordering — thermistor specifications vary across the MP, IM C, SP, and Aficio series.
Fix 6: Replace the Fusing Unit
If SC 542 returns after thermistor cleaning, thermostat testing, and a fresh thermistor — or if the fusing lamp has clearly failed or the unit shows visible physical damage — the complete fusing unit is the appropriate replacement.
Before committing to fusing unit replacement, consider the machine’s total page count. On high-volume Ricoh models that have reached or significantly exceeded their rated fusing unit life cycle, replacement is appropriate regardless of whether the firmware update was the immediate trigger. The update simply exposed a unit that was already at the end of its service life.
For comprehensive documentation on SC 542 and model-specific fusing unit guidance, Ricoh’s official knowledge base article on SC 542 provides the manufacturer’s recommended reset procedure and links to parts documentation for specific models.
Understanding the SP 5810 Reset — What It Does
Some users are understandably cautious about entering SP mode, so it’s worth explaining what SP 5810-02 actually does. SP 5810 in Ricoh’s service programming system is the SC code reset function — it clears the latched error flag stored in the machine’s NVRAM without modifying any other settings, calibration data, or machine configuration. It does not reset the page counter, change temperature settings, or affect print quality parameters. It is specifically and only a mechanism to clear a stored error condition after its cause has been addressed.
Running SP 5810-02 on a machine where the underlying fault hasn’t been fixed doesn’t damage anything — the error will simply return on the next startup. But running it after a genuine fix — thermistor cleaning, connector reseating, or component replacement — permanently clears the latched code and allows the machine to resume normal operation.
Tips to Prevent SC 542 From Recurring
- Clean the fusing thermistors during every fusing unit maintenance visit. A thermistor that’s cleaned proactively as part of routine maintenance never accumulates enough contamination to trigger SC 542 during or after a firmware update.
- Check for Ricoh firmware release notes before updating. Ricoh’s firmware release notes sometimes mention changes to fusing system parameters. Knowing a thermal calibration change is coming lets you schedule a thermistor inspection alongside the update rather than reacting to an SC code after.
- Use genuine Ricoh consumables. Third-party toner with different particle characteristics can accelerate thermistor contamination. Over many print cycles this contributes to the borderline thermistor readings that firmware threshold changes expose.
- Keep the machine’s environment stable. Unusually cold environments slow fuser warm-up, which combined with post-update threshold changes can push warm-up times outside the acceptable range. A machine in a cold room or near a frequently opened exterior door is more vulnerable to fusing temperature errors in winter months.
- Track fusing unit page count. The fusing unit has a rated lifespan — typically 100,000 to 300,000 pages depending on the model. Scheduling proactive replacement before that limit is reached prevents SC codes from appearing at inconvenient times.
When to Call a Technician
A technician is the appropriate next step when:
- SC 542 returns immediately after the SP mode reset, even after thermistor cleaning and connector reseating
- The thermostat tests open circuit and needs replacement — thermostats are small, precise components that are straightforward to replace but require correct identification and handling
- The fusing lamp has visibly failed (dark bands, no glow during warm-up when viewed safely through an inspection port)
- SP mode is inaccessible via the standard keypad sequence on your specific model and a service tool is required
- The machine is under a service contract, in which case SC 542 repair is typically covered
Wrapping Up
SC 542 appearing after a firmware update is a specific scenario with a specific cause — a firmware change to fusing temperature parameters that exposed a thermistor that was previously within tolerance. The fix path is clear: clean the thermistors, reseat the fusing unit connector, perform the SP mode reset, and confirm whether the error returns. If it doesn’t, the update triggered a calibration sensitivity shift rather than a hardware failure, and the machine is back in service. If it does return, the physical component — thermistor, thermostat, or fusing unit — has genuinely failed and needs attention.
Work through the steps in order, complete the SP mode reset only after addressing the physical cause, and the machine should be back in service without unnecessary parts replacement.
Frequently Asked Questions
What does Ricoh SC 542 mean?
SC 542 is a fusing temperature warm-up error, part of Ricoh’s 5xx series covering the fusing system. It means the fusing unit did not reach its required standby temperature within the time limit set by the machine’s parameters after startup. The machine locks itself out when this occurs to prevent incomplete fusing and potential hardware damage. Sub-codes (SC 542-00, SC 542-01, SC 542-02) indicate which thermistor or sensor detected the fault.
Can I clear SC 542 by turning the machine off and on?
No. SC 542 is a latched error code, meaning it is stored in NVRAM and persists through power cycles. The machine will display SC 542 and refuse to operate every time it’s powered on until the code is explicitly cleared through SP mode. The standard reset procedure involves entering SP mode via the keypad sequence (Clear Mode → 107 → hold Clear/Stop) and executing SP 5810-02 after the underlying cause has been resolved.
Why did SC 542 appear right after a firmware update when the printer was working fine?
Firmware updates can modify the temperature thresholds and warm-up time limits stored in the machine’s NVRAM that define acceptable fusing unit performance. A fuser or thermistor that was performing within the previous parameters may no longer meet the updated thresholds — not because it physically changed, but because the standard changed. Cleaning the thermistor(s) and performing the SP mode reset after the update frequently resolves SC 542 in this scenario without any hardware replacement needed.
How do I access SP mode on a Ricoh printer to reset SC 542?
The standard entry sequence on most Ricoh MP, IM, and SP series models is: press the yellow Clear Mode key → enter 107 on the numeric keypad → press and hold the Clear/Stop key for about 3 seconds until the SP menu appears. From there, navigate to Copier SP → SP 5810 → sub-code 02 → press 1 (or Execute). Power the machine off and on after the reset completes. Older Aficio models use a different sequence involving holding Online and Escape while powering on — the correct procedure for your specific model is documented in its service manual.
SC 542 came back immediately after I reset it — what does that mean?
If SC 542 returns immediately on the next startup after an SP mode reset, the physical cause has not been resolved. The most common reasons are: the thermistor is still contaminated and needs more thorough cleaning, the thermistor has physically failed and needs replacement, the fusing lamp is defective, or the thermostat has tripped. A reset that doesn’t hold is a clear signal to move from the reset step to the hardware inspection steps — particularly thermistor testing with a multimeter and thermostat continuity testing.
Is SC 542 always a fusing unit failure?
Not always — and particularly not when it appears immediately after a firmware update on a previously healthy machine. A contaminated thermistor, a slightly displaced thermistor, or a firmware-triggered parameter change can all produce SC 542 without any component having actually failed. Physical failure of the fusing lamp, thermostat, or thermistor is the cause when SC 542 returns after cleaning and resetting, or when multimeter testing confirms a component is out of specification.
Disclaimer: This article is provided for informational and educational purposes only. The fixes and procedures described are based on general knowledge of Ricoh printer fusing systems and publicly documented technical information. Results may vary depending on your specific printer model, firmware version, and fusing unit condition. We are not affiliated with Ricoh Company Ltd. Always ensure the machine has fully cooled before handling the fusing unit, and consult your model’s official service documentation before replacing any components. If the machine is under service contract, SC 542 repair is typically covered — contact your authorised service provider before attempting hardware repairs.